After six long months of procrastination...err...hard work and perseverence, I am quite happy to say, the crib is done.
Enough blabber, have a look at the pictures...here's one to get you hooked.
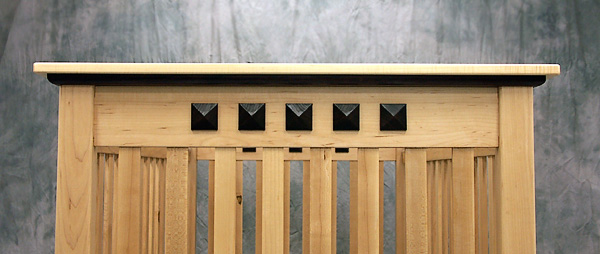
A close up of the inlaid walnut...

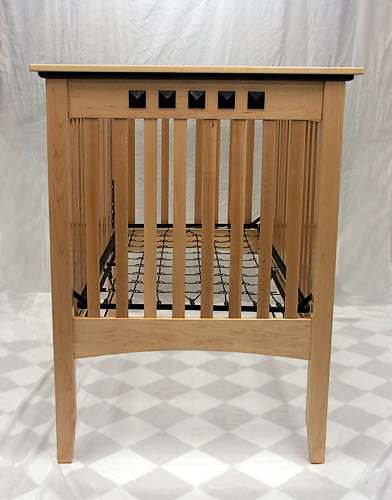
A view from the front, looking through to the back...
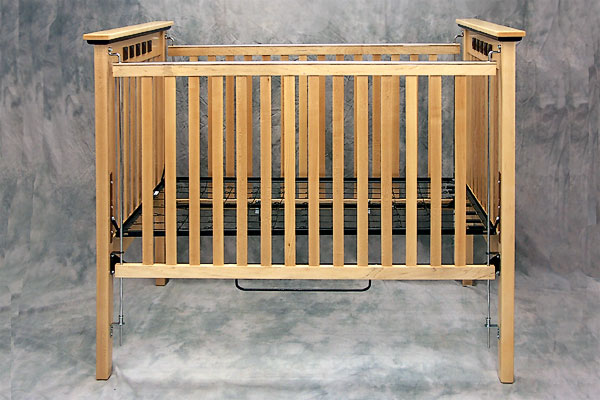
And finally, a look at the entire crib from the front...
All in all, this was a very rewarding project to build. Looking at it I find it rather hard to believe that this is something that I built with my own hands...and I find it even harder to believe that it actually went together and functions as it should! The trickiest part of the entire project was the finishing. There are a lot of little nooks and crannies to try to get finish into...and to get finish in there without messing up other parts of the finish was at times rather frustrating. But I learned a lot along the way, both in the construction and in the finishing...sometimes the hard way :)
The crib is finished with two coats of gloss Arm-R-Seal followed by two coats of semi-gloss Arm-R-Seal. I went through a quart of finish (a pint of gloss and a pint of semi-gloss), countless recycled t-shirts, a bejillion latex gloves, and a couple dozen foam brushes in the process.
I hope, for Mike and Christy's sake, that Kaitlin Ann gets many quality hours of sleep in the crib. Who knows, maybe a new nephew would enjoy it too? :)
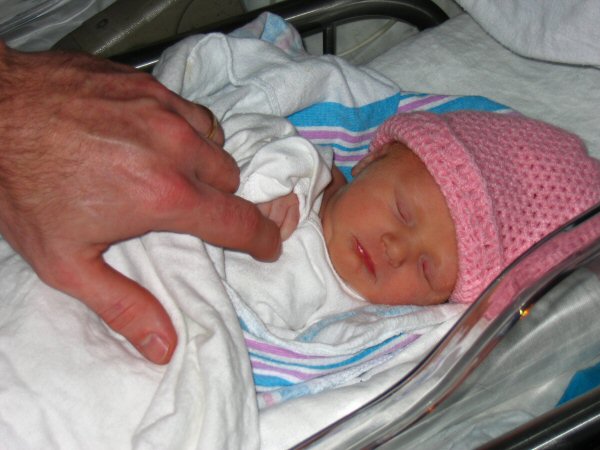
Meet Kaitlin Ann...the future resident of the crib that I need to hurry up and get done. She weighed in at a tad over 5lbs and is 16 1/2" long. Both mom and baby are doing well, although pooped out. That's my hand in the picture...she's pretty wee.
...it smells like victory! Or at least the upcoming completion of a project.
Made a trip down to Woodcraft today to pick up some finishing supplies for the crib. Had to make a stop at the Orange BORG (you know...Same As Lowe's Only Orange) to pick up some rags (old redneck t-shirts as Mike likes to call them) and a drop cloth. After that, it was all bidness.
Here's a picture of the starting of the finishing...
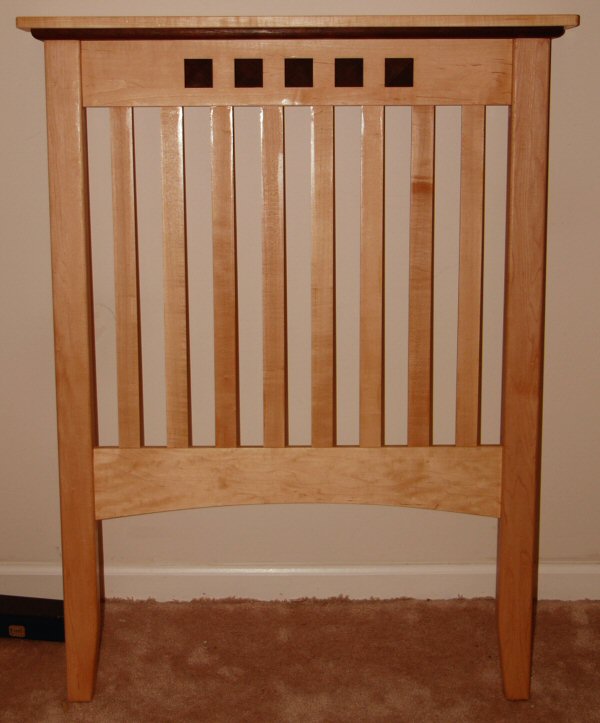
And a before picture, just for reference.
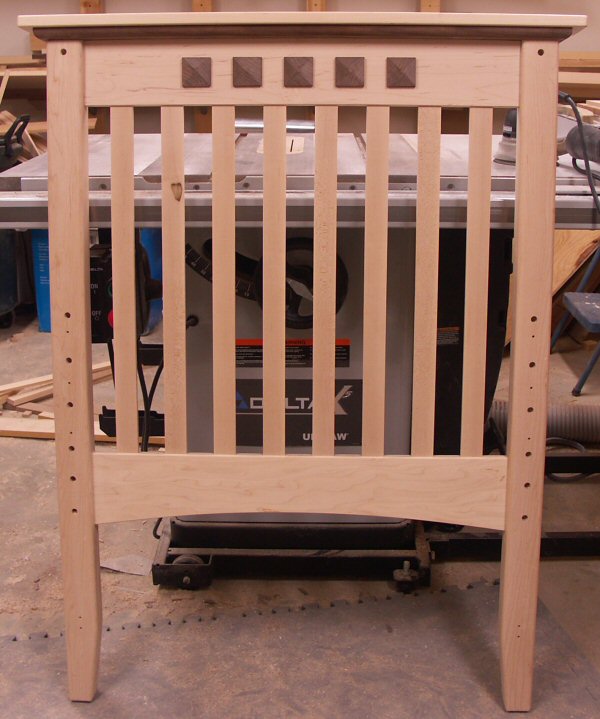
Yes, it looks a little glossier in some places than others. This is only coat one and I haven't hit it with steel wool yet. The first coat is hand-rubbed gloss Arm-R-Seal and the second coat will be the same. The last coats are yet to be determined. I'm not sure if I'm going to go satin or semi-gloss. I'm leaning more towards satin as it will tend to hide wear better than semi-gloss will, but I also like a little glossier finish. Decisions, decisions...
The one thing I'm really pleased with is the way that the finish makes the walnut stand out from the maple. In the "before" picture, the walnut was just sorta there...it was pretty, but didn't really pop out at you. After just the first coat of oil the walnut was really starting to "pop" so to speak. I can't wait to see what it will look like with another few coats of finish. Actually, I'm just hoping the damn thing fits together :)
...nothing around here would get done.
Not that I'm a procrastinator or anything. It's just that for some reason, I haven't had the urge to get out to the shop and ruin wood. Could be the hour-plus commute during the work week or it could be all of my friends badgering me to play Unreal Tournament...at any rate, Amy and I decided to take a week off, so I decided after a few weeks away from the crib it was time to get to work...especially since my sis-in-law is due to download at any time now :)
So, at any rate, here are the final two assemblies, the gates. They are, well, underwhelming to look at compared to the sides of the crib, but just to prove that I have done something productive this week, here is a pic:
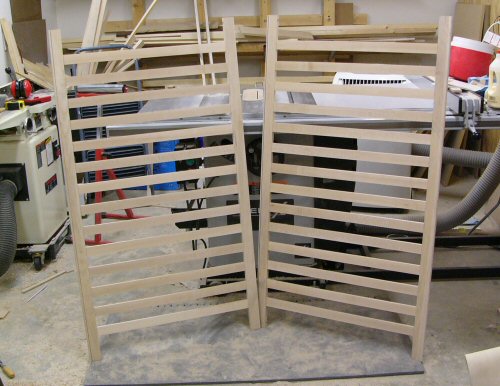
Everything has been sanded and is, as Nahm would say, ready for the finishing room. Hopefully I'll have the finishing done by the end of next week.
And, as a bonus for being patient, here's a bonus picture of me hard at work.
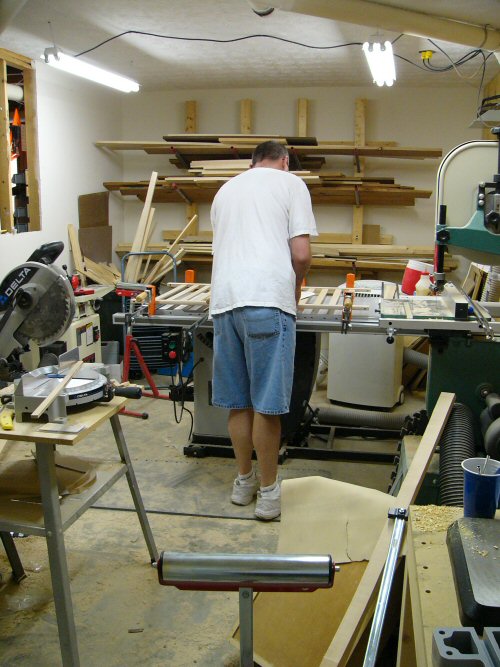
The odd thing about this picture is that the perspective makes it look like I'm about twelve feet tall, that or the ceiling is really low. It also makes the shop look mighty messy too. Its just the lighting, I swear :)
Maybe not, but I couldn't come up with a catchier title.
Headed down to the garage ... err ... shop this morning to try to get my behind back in gear. Amy and I spent some much needed downtime together on Saturday and I spent all day Sunday with some networking equipment and an unruly server. So today I was determined to make some more progress on the crib. And, in all honesty, I didn't get very far...or at least not as far as I would have liked.
However, I did complete the two sides of the crib, once and for all, today. So, I'm sure you'll all be glad to know, that these should be the last pictures of these things until I apply finish and attempt to assemble.
First off, here's one side, full on:
And the same side, a little closer up:
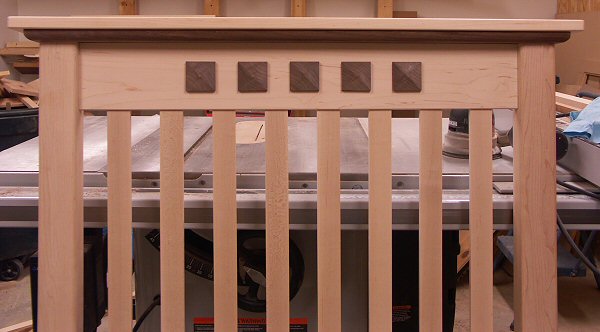
And finally, it's twin. I think this picture shows off the contrast between the lighter maple and the darker walnut.
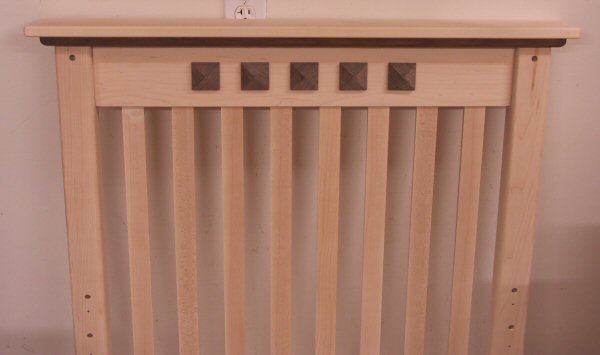
I really like the way the walnut stands out. While I was waiting for the glue to dry, I experimented with some finishes on scraps of both the maple and the walnut. My main goal is to find a finish that doesn't alter the color of the wood as I really like the light color of the maple, which should turn a bit yellower with age, but will bring out the grain of the wood. And, surprise, surprise, I think I'm going to stick with Arm-R-Seal. I guess part of the reasoning for that is that I'm familiar with it. I was trying to decide between Danish Oil, shellac or a billion other choices, but I'm pretty happy with the way the Arm-R-Seal looked.
At any rate, two gates to assemble and then its time for the moment of truth...seeing if everything fits together. Stay tuned for pictures of the finished product or recordings of my violent tantrum.
...and headed for home. Yes, another title with the dreaded points of ellipsis in it.
After the sandingfest yesterday, today was a day for glue-ups. Whilst the glue was drying, I started to cut the top caps for the sides of the crib as well as the decorative pieces. As you can see from the pictures, the contrasting walnut really stands out against the maple.
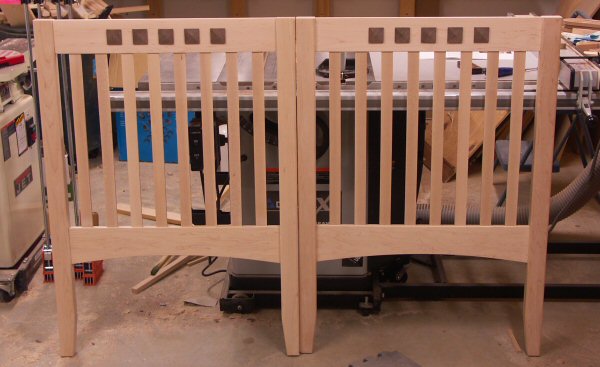
As you can see, the crib is really starting to come together. The hardest part of today's goings-on was trying to figure out how to set up the saw to create the decorative little pyramids that fit into the mortises on the top rails. After cussin' and swearin' for an hour or so, I emerged from a pile of wasted scrap cuts with the solution. And I must say, the walnut really makes the piece stand out.
Not shown, but almost complete, are the two caps that will be affixed to the tops of the sides of the crib, one of walnut and one of hard maple. I just need to do some final sanding to them.
This week I'll start working on the gates to the crib, which hopefullly won't take too long. It's time to start giving some serious thoughts to a finish for this project. At the moment I'm leaning towards a shellac finish...but there's always room for other suggestions.
First off, sorry, no pictures today...after four-plus hours with the random orbit sander, I don't think I could hold the camera still.
Today was a day of sanding. Sanding some more, and then sanding again. I finally finished cutting all the parts for the sides of the crib so today I took it upon myself to sand them all...boy, that sucked.
At any rate, one of the sides is glued up and in clamps. Tomorrow morning I'll glue up the other side...should be all downhill from there.
OK, actually last night and today, but that would have made the title of this post entirely too long.
After a crazy week at work, last night I finally got the opportunity to get back out into the shop to continue work on the crib. As I'm waiting for my mortising machine to arrive, I didn't want to start working on the rails for the sides of the crib as, if I remember correctly, you should always make the mortises first...that way if you screw up the mortise you can cut the tenon to match. So anyway I decided to skip ahead to cutting the slats for the sides of the crib...the plans call for 46 of these things.
As I'm looking at the blanks to be ripped into the slats, I'm trying to decide the best way to rip them without having a chunk of hard maple (which is exactly that...really hard...and heavy) flying back at me. The last thing I wanted to do was to start off the weekend making an example of myself. As I eyed the table saw and, being the eternal pessimist, thinking of all the things that could go wrong, I turned around to the bandsaw. Figuring that ripping the slats using the bandsaw would greatly reduce my chances of injury, I set up the fence to rip my slats 7/16" wide...they were to be cut a bit wider then I needed so that I could plane them down to remove the saw marks.
So I get started...jointed and planed four 30" chunks of maple down to 1 3/8" and commenced the rippage. I was having a good ol' time, rippin' and jointin', when suddenly it dawned on me...I never checked to see what the actual thickness of the finished cut was...
Now, on to the first lesson...never believe the measuring rule on the fence. (My sincerest apologies to those who were waiting to hear about the self-amputation of a digit...no dice, still counting to ten). See, I'd never used the fence on the bandsaw for ripping anything, so I had no idea that it was off...about 1/8" off, to be exact. So instead of ending up with a bunch of slats 7/16" wide, I ended up with a bunch of slats a hair under 5/16" wide. And as the plans called for slats 3/8" wide after being cleaned up, I was left with a pile of kindling. I'm sure I'll find some use for them sooner or later, but nevertheless, I was rather, well, pissed and promptly called it a night. I had truly ruined enough wood for one day. Luckily, however, I didn't finish ripping all the too-skinny slats...only about half.
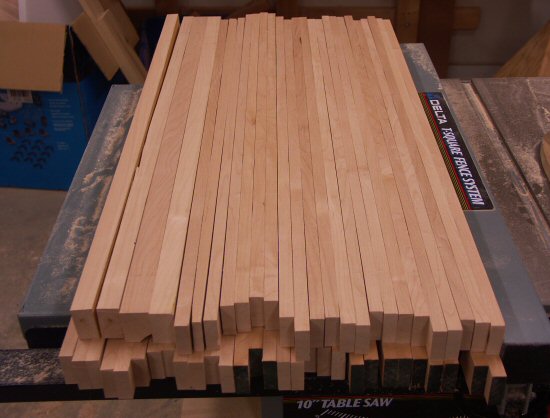
Headed back out this afternoon to resume the festivities. After last nights bandsaw debacle, I decided to make a test cut on the table saw, just to see if I could do it without launching said maple across the shop. The table saw actually did the job quite nicely, which brings me to the second thing I learned today...Forrest table saw blades are everything they are cracked up to be. I had what I thought was a fairly decent 40 tooth blade that worked pretty well on thin stock, but after trying to use it to mill the blanks for the legs of the crib, it quickly got put on the shelf. At first I thought that maybe my saw wasn't capable of dealing with stock that thick, especially hard maple. So I decided to try out the Woodworker II. Went through that wood like it was butter. And that blade (and the old saw, for that matter) earned its keep today as I was able to rip everything you see below...and yes, I'm still counting to ten. And I am quite happy to report that no wood was flung in the process.
Tomorrow, however, will most likely be a wood-ruining-free day...the Daytona 500 is tomorrow and all...
One last thing as a post-script...no, I have no affiliation with Forrest Blades or any of their resellers. I just think their blades kick ass.
(Yes, I know, two posts in one day!)
My brother and his wife are expecting a baby sometime early this summer. So, I thought a great gift for the little one (don't tell anyone, but I'm hoping for a boy!) would be a crib. I thought it would be a little more personal than something from Toys 'R Us or wherever.
I actually tried to start this project about a month or so ago with the acquisition of the plans and hardware for the crib. There was a slight mix up with zip codes and shipping and such, so I didn't receive the plans and hardware until last week. This week, the fun began...
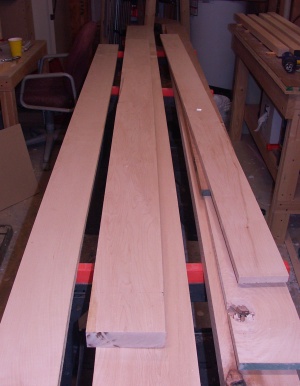
As you can see here, there is a large quantity of hard maple waiting to be made into something useful. This is the stock from which I am building the crib...a whole bunch of 8/4 stock and some 4/4 stock. There is a piece of walnut in the pile somewhere which will be used for some accent pieces.
So anyways...I got started today milling up the legs for the crib. Nothing special right now, just four pieces of wood on the bench...but its a start. I was going to start cutting up the slats for the crib also, but thought better of it. That will give me something to do tomorrow.

I'm hoping to really get cranking with this project when the new saw arrives. My main problem right now is that my current saw isn't exactly pleased with the task of having to cut this 2" thick hard maple...it's doing it, but complaining quite a bit.
Thank God I have until May or so to get this done :)